The Brief is simple but challenging. Design a Crayford focuser that is 3D printed, Ultra-low profile, performs as well as any $$$ commercial Crayford focuser, even lower profile than can be purchased, LOOKS GOOD, requires NO post machining, can lift 1kg of equipment at full extension and can be assembled with off the shelf bearings and fixings. That’s reasonable surely?!!
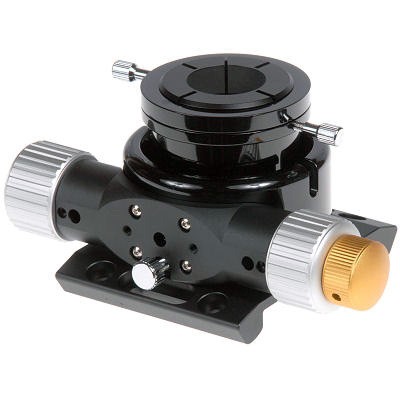


So after a few hours at the CAD coal-face (I use solidworks 2017) I came up with what is a pretty standard design but with a few tweaks to make it suitable for 3D printing.
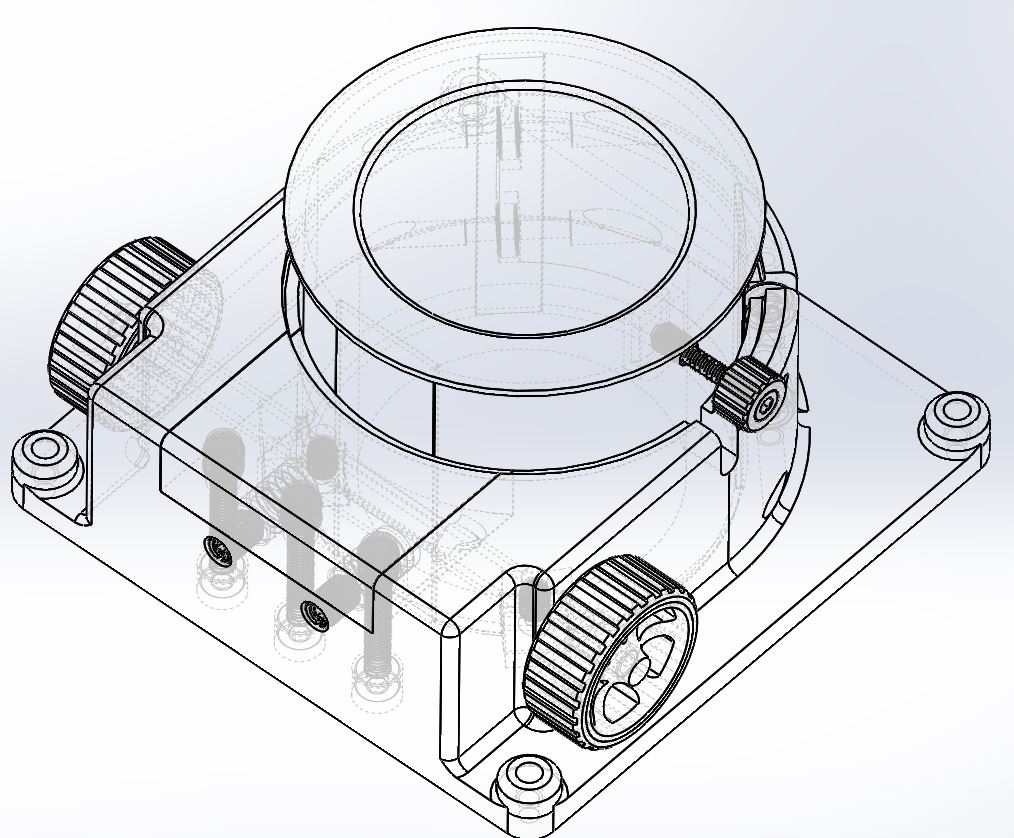
- The steel pinion on the focuser wheel and the rear 8mm bearings run against 1mm thick Aluminium plates that are bonded to Flat recessed areas on the drawtube. There are 2 reasons for this namely so I don’t have to post machine flats on the drawtube and also because the compression forces of the steel pinion and bearings permanently compressed against the plastic PLA would eventually indent it as it simply hasn’t got the surface hardness to survive the compression.
- Wall section is far thicker than you’d find on an Aluminium machined focuser for obvious reasons or strength and more importantly stiffness. This applies to both the drawtube and the base-plate.
- I’ve completed the circle “at the rear” if you like by adding a quadrant section that is bolted through to the main base-plate and THROUGH the 8mm bearings. Many Crayfords are open at the rear, but stiffness here is so important.
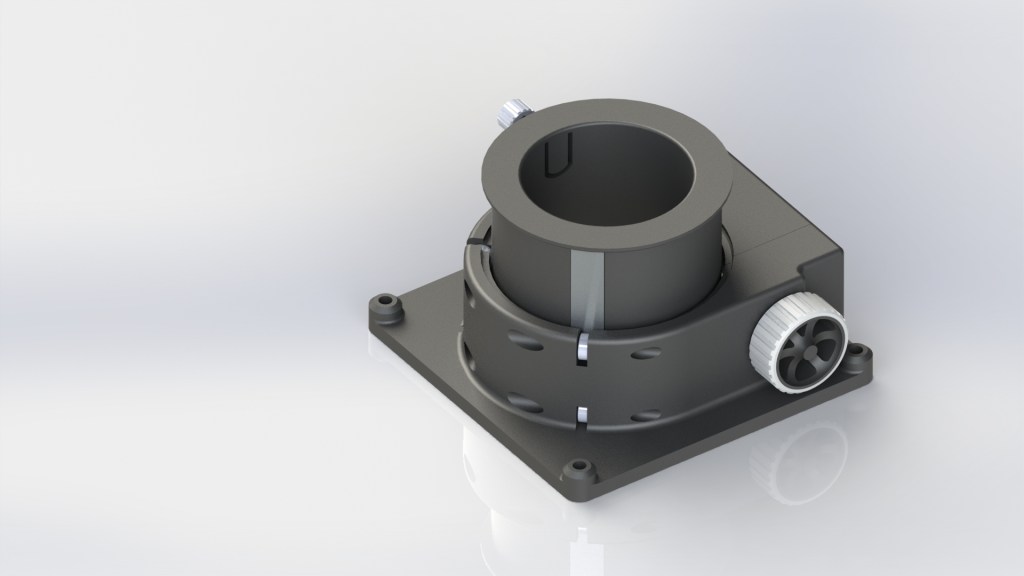
- The Draw tube nests FULLY down into the chassis so the top edge of the 2in eyepiece or adaptor is as far in as physically possible.
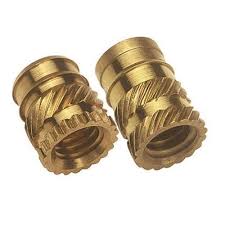
The rest is pretty much standard. Belt and braces. Most of the fixings are secured with “Heatserts” melted into the plastic printed holes with a soldering iron. They are super handy and super strong.
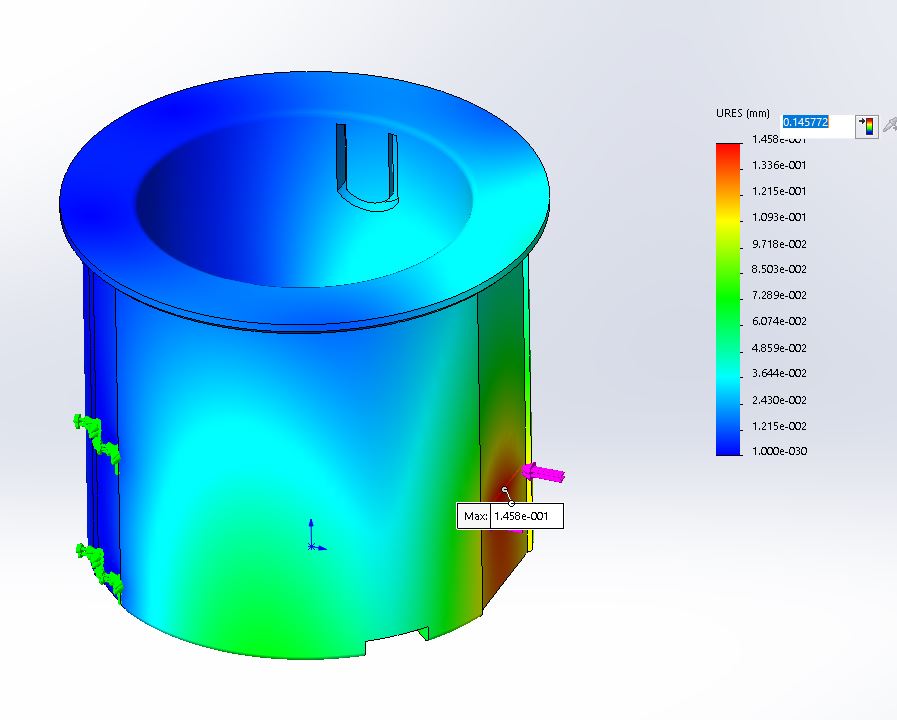
Some hand calculations and FEA to backup the calcs were done. The drawtube was loaded up with a force of 200N applied by the pinion (20Kg equivalent) to look at the deflection of the drawtube. It was around 0.15mm for printed PLA which is more than acceptable.
A basic free body diagram for the loads, static forces, sum of moments etc was done for the system assuming the worst case scenario: the drawtube fully extended with a 1.5Kg load at the end. This allowed me to decide upon a force to apply via the FEA to the drawtube.


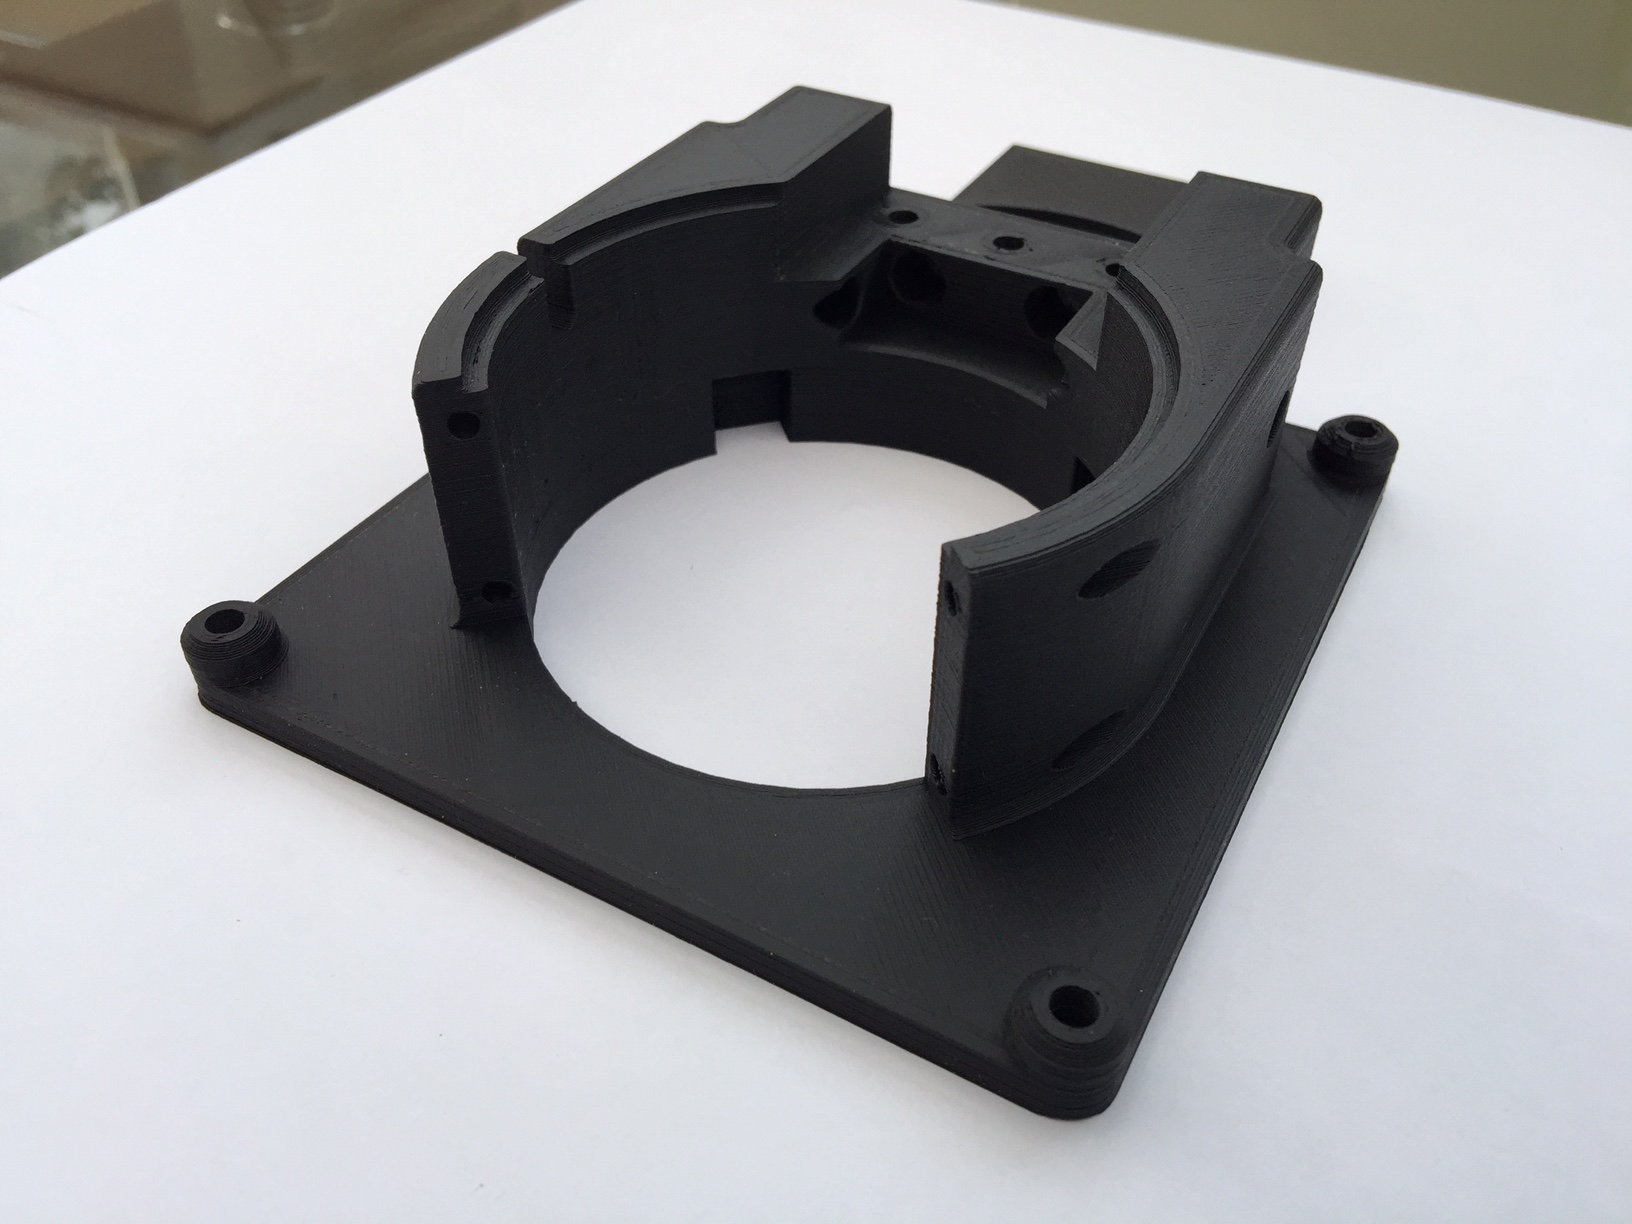
So to the prints……well these are the results of the first and largest part of the printing; namely the base plate The details of the printing deserve their own post. I use an Anet A8 which is by all accounts a budget home built printer but non-the-less produces excellent prints when well calibrated and set up.
The filament I am using is Matte black PLA
https://shop.3dfilaprint.com/filaprint-pla-matte-black-175mm-1kg-3d-printing-filament-15096-p.asp
This particular stuff is excellent, and extremely rigid produces neat prints.
NOW FOR A BIG DISCLAIMER!!!!!!!!!!! The FEA and calculations I have done are assuming that of a fully 100% filled part. However, I know I’m not lifting huge payloads of photographic equipment as this one will initially be used on my 12in F3.3 Dobsonian as a visual scope, MAYBE a small imager if I get it on an equatorial pier. My heaviest eyepiece combo will be a 24mm TV Panoptic+Coma corrector weighing about 350g. SO…….I printed at 20% fill with a 1.6mm wall thickness. Reducing the fully filled part from 160g to approx 90g. The strength will be lower yes, but not by much. It’s very surprising how strong 20% fill prints actually are. I use a fill called “Gyroid” for those initiated in 3D printing.
So here she is. The main chassis. I love plastic….Layer height was 0.2mm and they’ve come out very neat indeed. Within tolerance…..PLEASE…!!!!


Th build will resume shortly once the postman delivers the 5mm steel pinion shaft and some 8mm bearings…..I wait by the window with a nervous kind of energy.
To be continued………..
